RSS

The Case for 2 Kitchen Sinks
While the majority of American kitchens have only one sink, the trend toward two is growing quickly in new construction and major remodels. Why would you possibly need two kitchen sinks — that is, if you are in the fortunate position to be able to afford this luxury? In a nutshell, for better kitchen workflow.

There’s a lot to think about when planning a kitchen layout. This story will first make the case for having two sinks, and then address considerations for the all-important prep sink — the place where you’ll likely spend most of your kitchen time.
Jules Art of Living
Why Having Two Sinks Is So Great

Everything in its place. Having two kitchen sinks allows one to be the dedicated cleanup sink and the other to be the prep sink. With this division of sink labor, the space around each sink gains a designated purpose. Prep tools, bowls, colanders and appliances can be stored near the prep sink, while dishes, silverware, serving pieces and glasses can be stored near the cleanup sink and dishwasher. When you separate the cleanup zone from the prep zone, you improve traffic flow and organization.

Multiple cooks in harmony. Another benefit of having two sinks is that multiple cooks can work in comfort simultaneously. With only one sink, prepping and cleanup activities all take place in the same location, creating a cramped work area no matter how expansive your kitchen is in square footage. Two well-placed sinks eliminate this problem.

Efficiency for solo chefs. The two-sink setup also works better for a soloist. It prevents dirty dishes from getting in the cook’s way or from forcing the chef to stop in the middle of a task to clean out the sink so that it can be used. Instead, dirty dishes go in the designated cleanup sink instead — and the cook(s) can keep right on cooking.
 
Kitcheneering
Dual Sinks in Action

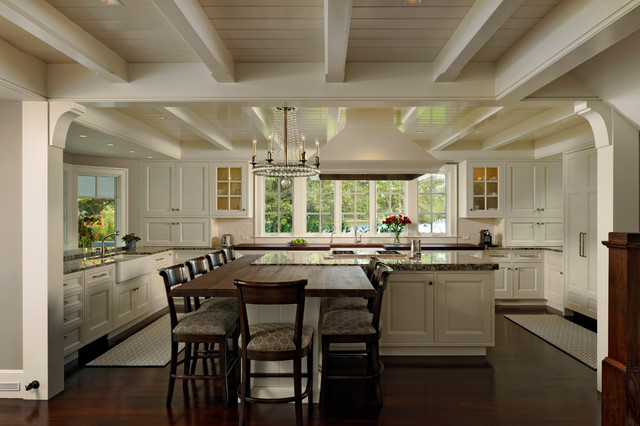
This picture shows me preparing a meal with clients in the two-sink kitchen I designed for them. I’m chopping vegetables at left, while another woman rinses vegetables at the island prep sink. At the cleanup sink on the back wall, a man loads prep tools and mixing bowls into the dishwasher. As you can see, with two sinks everyone has space to work without being in one another’s way. The cooking process is more enjoyable and efficient.

Now that you’ve seen two sinks in action, let’s look at some specific things you’ll want to consider when planning where to put your prep sink.

Find a kitchen designer near you
 
Kitcheneering
1. Prioritize the Prep Sink

When planning your kitchen, it’s critical that you give the prep sink the best real estate in the room. That’s because you probably spend more time chopping and prepping food than you do rinsing dishes.

If you want a social kitchen, put the prep sink on the island. If you have a beautiful view, put the prep sink facing the window. When I make these suggestions, some of my clients object, because prioritizing the food prep sink may mean locating the cleanup sink so that they’ll be doing dishes in front of a wall. But remember, most dishwashing takes place after dinner when there isn’t much of a view anyway.

2. Know the Ideal Prep Sink Size

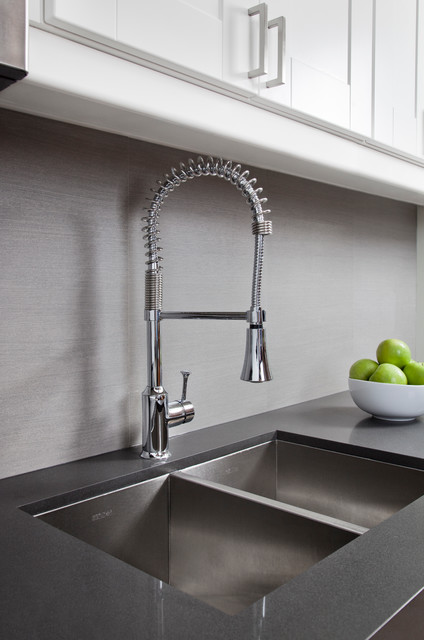
The most effective prep sinks are single-bowl, 16 to 21 inches wide, with a garbage disposal. The sink must be large enough to fit your largest colander and most frequently used pots and pans, without being so large as to waste important counter space. While the prep sink’s primary purpose is food preparation, you should also be able to comfortably wash a pot or pan within it as it comes off the stove. This allows the prep sink to function as a secondary cleanup sink after a large gathering.
 
TOP DRAWER | Luxury Home Builder
3. Consider Counter Space

You’ll want as much room for food prep as possible. Four feet wide by 2 feet deep is the minimum continuous prep area you should have next to the prep sink. Ideally, I like my clients to have 6 to 8 feet. If you don’t have room for a 6-foot island, consider a peninsula instead.

If you’re locating your prep sink on an island, don’t center it in the middle. And if you’re placing the prep sink on a perimeter counter, don’t place it in the middle there either. Instead, put the sink to one side so that there is as much continuous counter space as possible.

Think about it: Even a modest meal for six requires two or more cutting boards, raw ingredients, containers, tools and small appliances. And if you are like me, there’s also a snack and some wine to enjoy while readying the meal. Whether you are preparing food, plating up or serving a buffet, these activities are easier to do on one large surface, instead of jogging from one too-small section of counter to another.
 
Bernard Andre Photography
4. Stay in the Food Prep Zone

The prep sink belongs in the food preparation zone. You should be able to move from the fridge to the prep counter to the cooktop or range in a couple of steps, with no obstacles in between. So don’t put your prep sink on the opposite side of the kitchen from your cooktop or refrigerator, especially if there is an obstacle (like an island) between them.

If possible, island prep sinks should be located on the side of the island facing the refrigerator, but on the opposite end. This way, items coming out of the fridge have a clear counter on which to land, but they don’t clutter the prep zone.

As a side note, try to lay out the kitchen so that the path from the eating area — whether it’s an in-kitchen eating nook or a formal dining room — doesn’t cross the cooking zone. Having smooth, uninterrupted traffic flow is the most important element of functional kitchen design. You don’t want the person clearing dinner dishes getting in the way of your efforts to plate up dessert.
 
NARI Silicon Valley Chapter
5. When Putting the Prep Sink on an Island

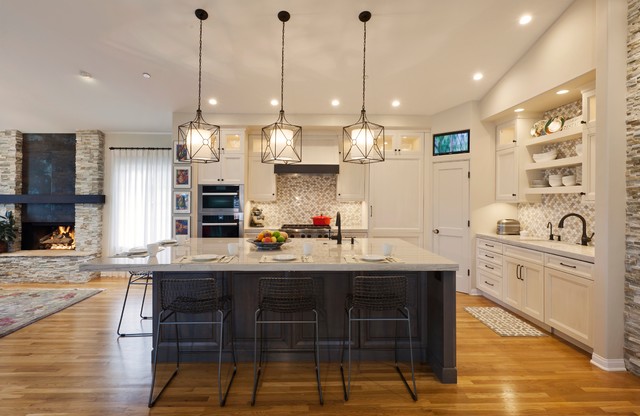
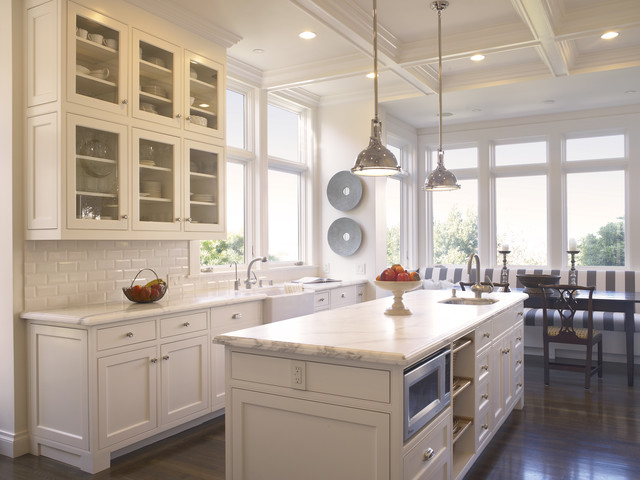
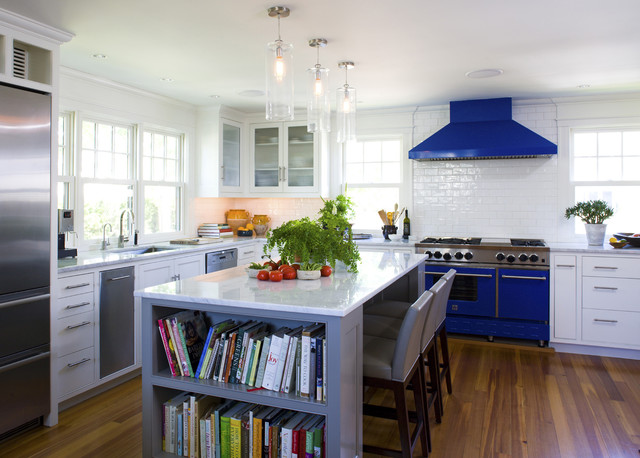
If you’re locating your prep sink on an island, it’s important to put it on the side closest to the range. If the prep sink is around the corner from the cooktop, then you are either wasting counter space and cramping your room, or you have to take several steps around the corner to get from the prep area to a cooking surface.

Here, it takes just a pivot to get from prep counter to cooking. This makes it much easier to monitor what is on the stove while you continue prepping.
 
Johnston Design Group
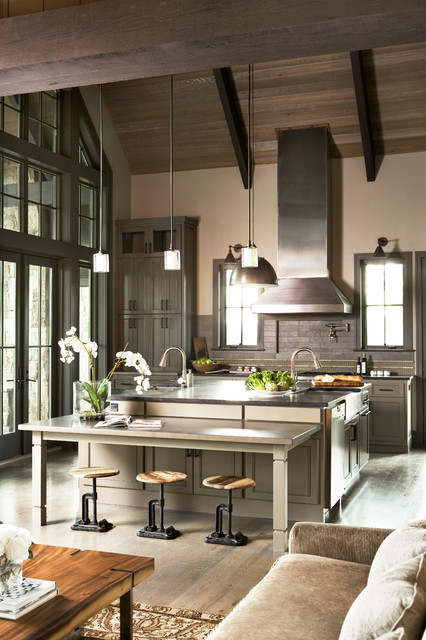
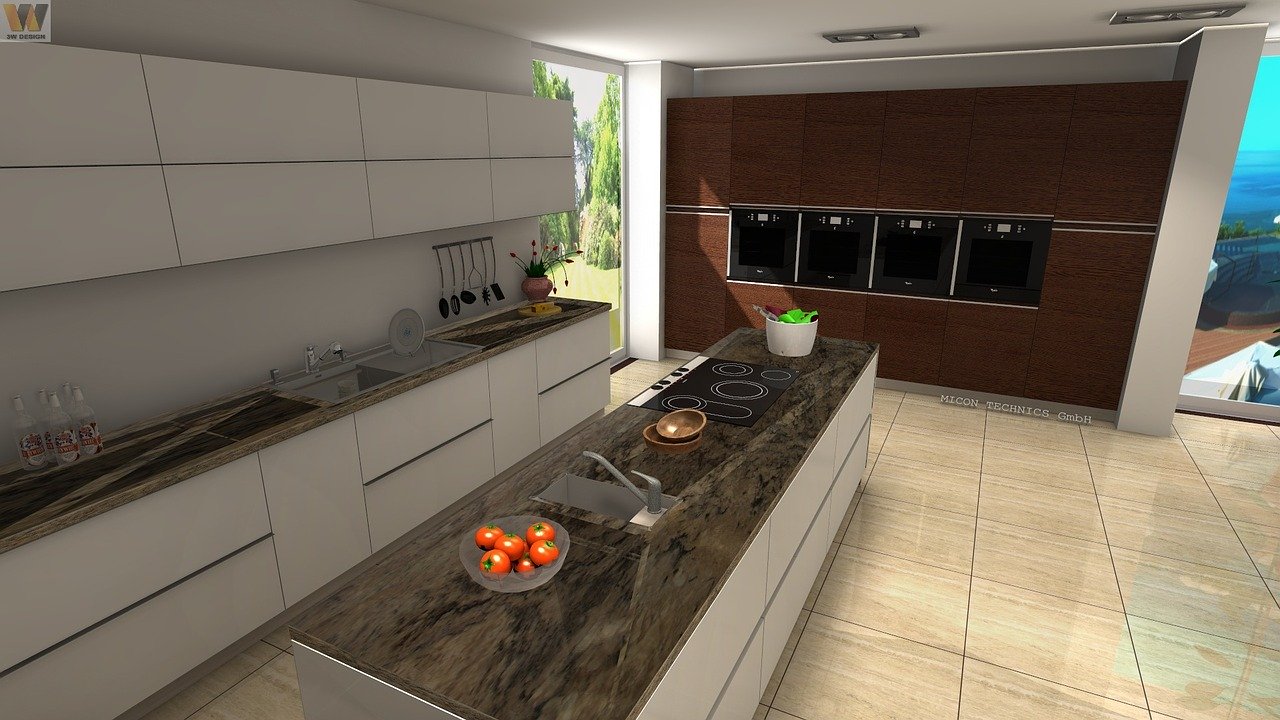
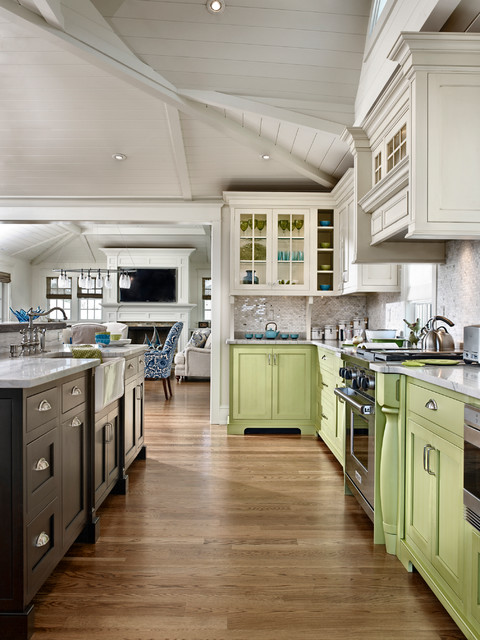
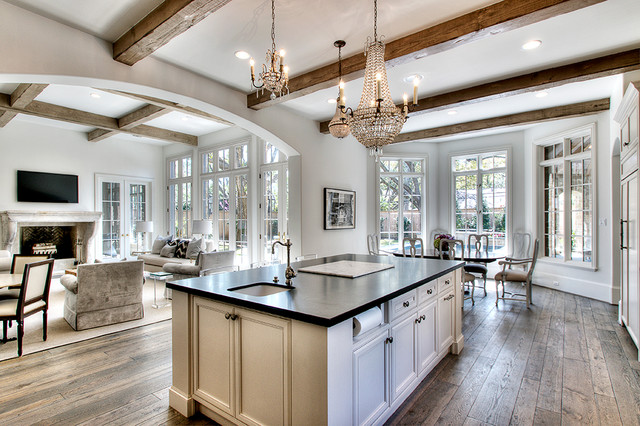
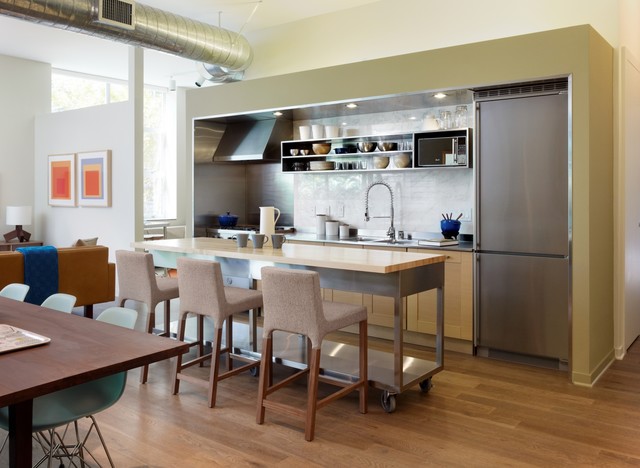
This island offers two sinks. It’s a large open-concept kitchen, yet with all the windows, doors and walkways, there isn’t a lot of wall space for perimeter counters. Placing the sinks on opposite sides of the island provides for both prep and cleanup space. It also allows you and your sous-chef to easily converse while preparing dinner.


Shop for kitchen sinks on Houzz
 
Arnal Photography
6. Perimeter Spots Follow the Same Rules

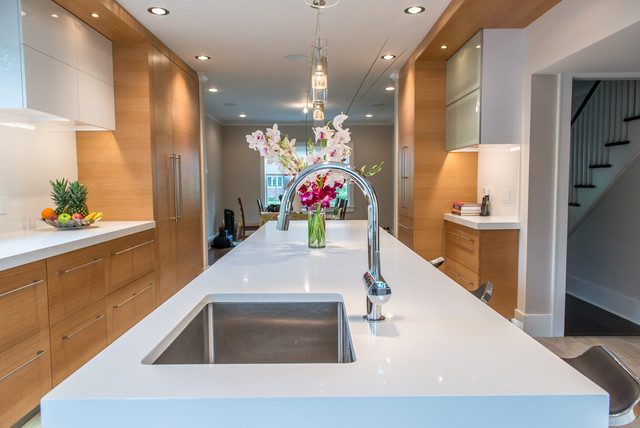
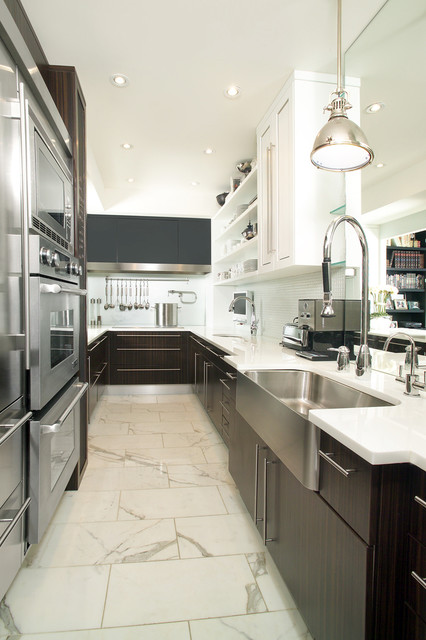
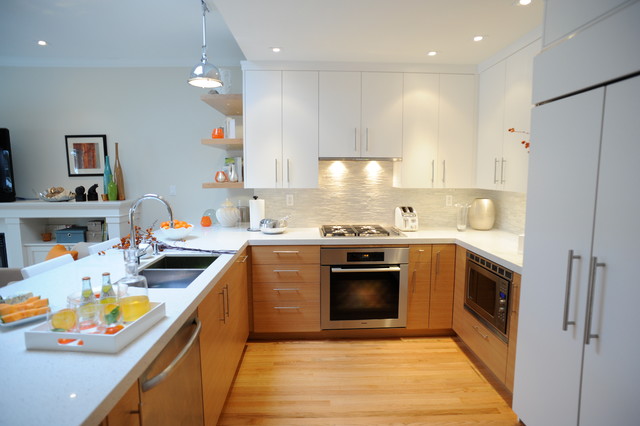
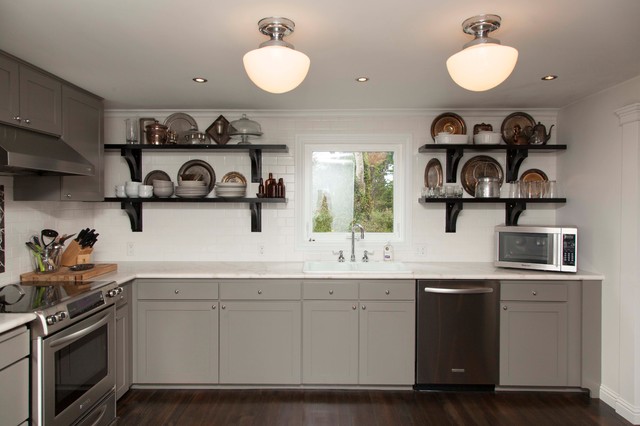
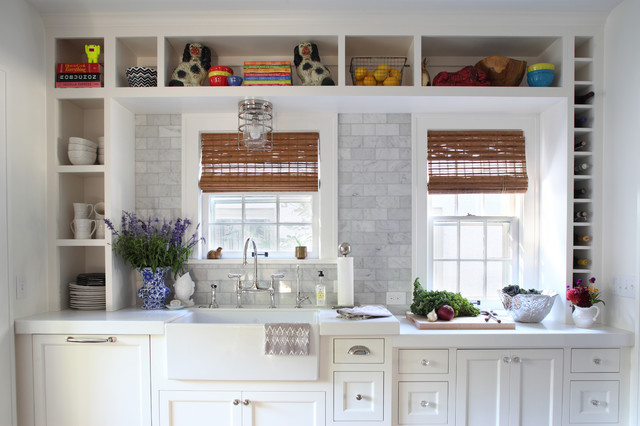
You don’t need an island to enjoy the benefits of a prep sink. This galley kitchen still has room for two sinks. Notice that the cleanup sink is toward the entrance, keeping dirty dishes or well-meaning guests from getting in the cook’s way. The prep sink is comfortably close to the cooktop for easy transitions between prepping and cooking.
 
Jennifer Gilmer Kitchen & Bath
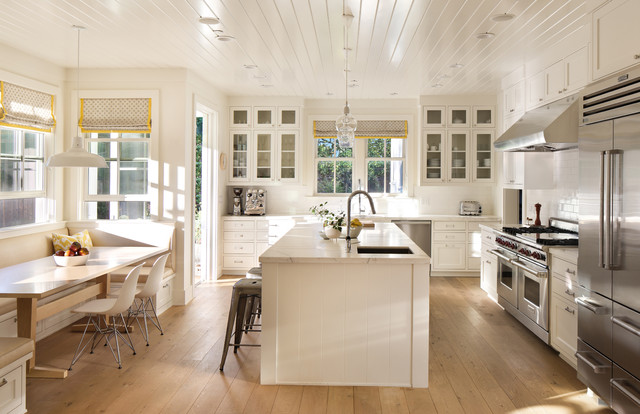
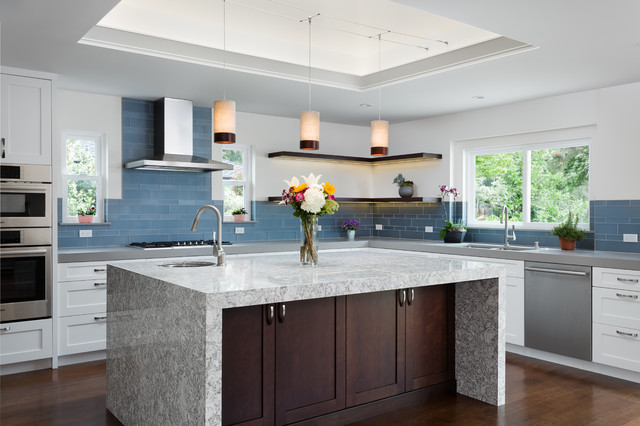
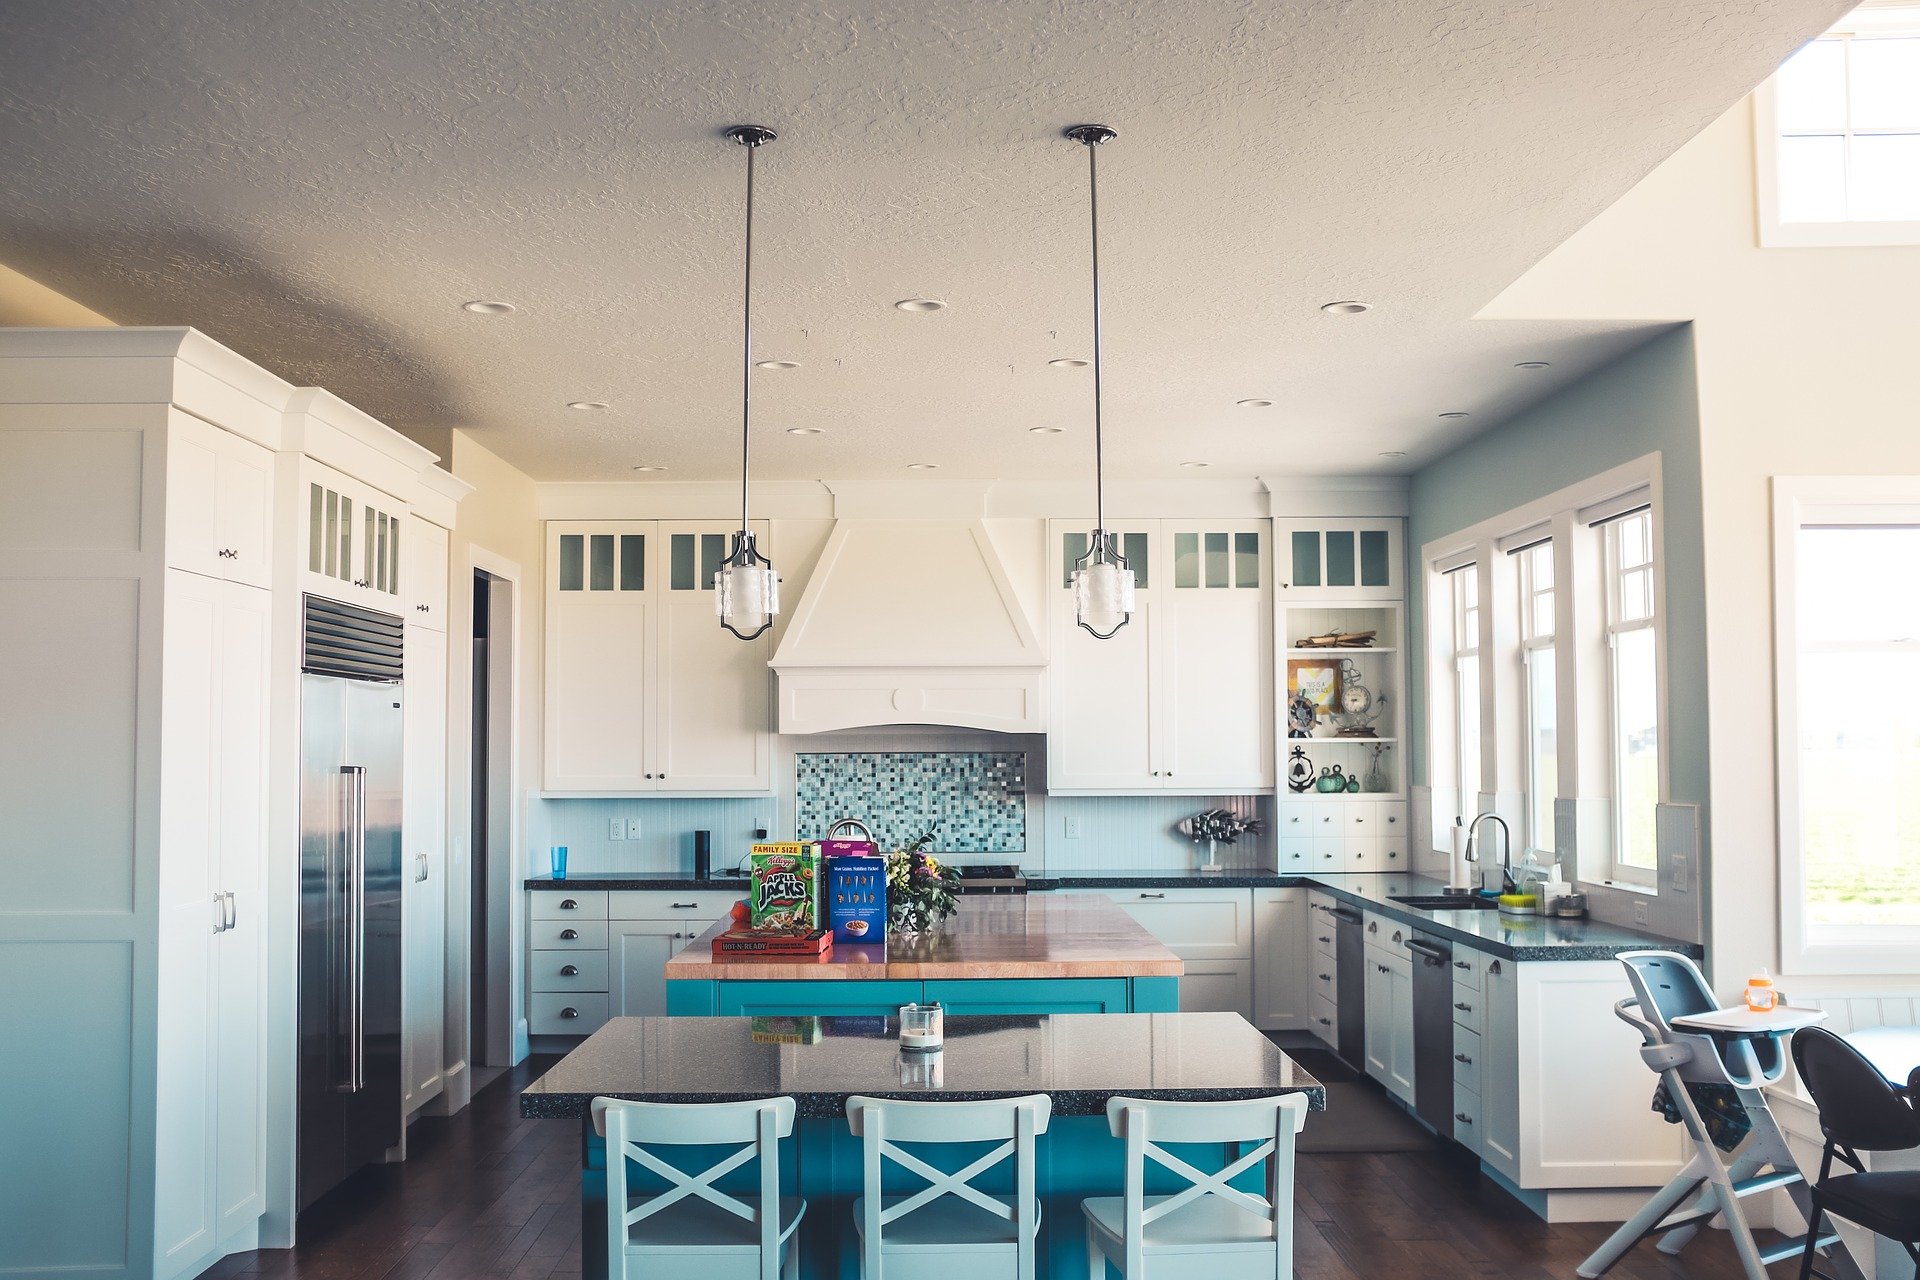
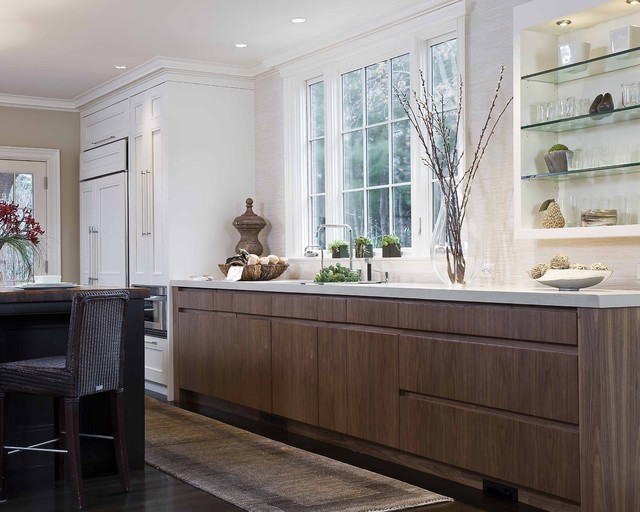
While this kitchen has an island, the prep sink here is also located on the perimeter, facing the window. They had a nice view and so chose to put the sink in front of it, and the cooktop on the island. Because that side of the kitchen has expansive counters, they were able to maintain symmetry with the window without sacrificing continuous prep counter space.
 
Kitcheneering
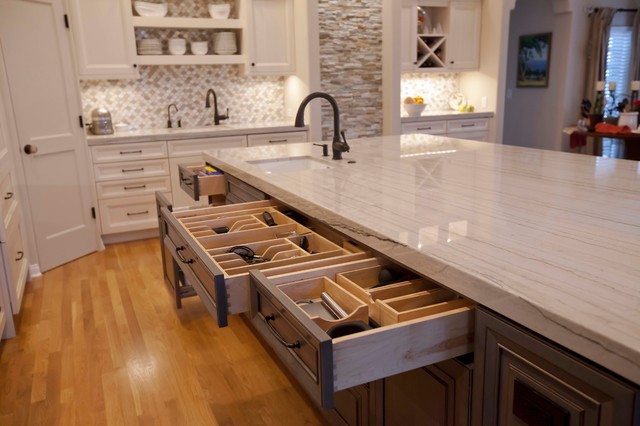
7. Consider Prep Tool Storage

Since prep sinks function for before-meal preparation, you want to include shallow drawers nearby for your tools: knives, peelers, whisks, spoons, measuring cups and all your favorite gadgets. Small appliances like your food processor or rice cooker, mixing bowls, colanders and salad spinners can be stored in deeper drawers or rollouts underneath. This is the oceanfront real estate in your kitchen — make sure that everything stored here gets used frequently. If the potato masher comes out only at Thanksgiving, put it somewhere else.
 
source: houzz.com
Read

11 Ways to Update Your Kitchen Without a Sledgehammer
OK, so you have a perfectly good kitchen. The layout works and the cabinetry is solid, but it just needs a little uplift. There are plenty of relatively minor changes you can make that don’t involve restructuring your life or your house. Here are several you can try.
Beach Dwellings
1. Repaint Your Cabinets

A fresh coat of paint can transform a kitchen from dark and dingy to light and airy. If you are a few years away from that big kitchen renovation, this is a great time to have some fun with color.

Find a contractor on Houzz
 
Dijeau Poage Construction
2. Upgrade Your Countertop

Changing a dated countertop will give new life to your entire kitchen and add immediate value.

Contact a countertop installer
 
Judith Taylor Designs
3. Install a New Backsplash

If your cabinetry and countertop work nicely but your room lacks pizzazz, a new backsplash can add loads of personality and really boost your kitchen. A bit of texture, sparkle or gloss will give simple cabinetry plenty of presence.


Shop for tile on Houzz
 
Parker House Inc.
4. Make a Statement

New jewelry always picks up a mood, and it can do wonders for your kitchen, too. New hardware can dress up plain cabinets, while standout lighting fixtures can add a surprising wow factor.
 
Rad Design Inc
5. Change Your Faucets

A detachable spray hose comes in handy for so much more than just giving a bath to the toy poodle. Try a spout with a flexible braided water-supply hose. It looks better than a plain black rubber hose and will last longer.
 
Nic Darling
6. Expand Your Horizons

Need more surface area?
You may not need to start from scratch. If you have an island, you can introduce a different material, such as wood, on an added eating counter either below or above the island level.

The standard countertop/island height is 900mm. A nice option, like you see here, is to add an extension at dining table height (about 760mm is typical). The great thing about adding an extension like this is that regular kitchen and dining chairs will pull up to the counter comfortably. If you prefer a higher surface, you could opt for bar height (900-1200mm).
 
Whitney Lyons
7. Consider Refacing

New cabinet fronts and doors can provide a welcome facelift if the layout already works and the cabinetry boxes are solid.

How to Reface Your Old Kitchen Cabinets
 
MartinPatrick 3
8. Rethink the Uppers

Open shelving offers an opportunity to display collections or just keep frequently used items accessible. Wine and oil bottles are great for showing off.
 
Venegas and Company
9. Add Cozy Touches

A runner is a great addition to a galley kitchen floor. I don’t know why we are disciplined to treat our kitchen like it has a different set of rules when it comes to decor. For example, I’m all for adding a table lamp for an unexpected element in a kitchen.
 
Incorporated
10. Add a Floating Island

If a new bank of cabinetry is beyond the budget, try a ready-made freestanding piece to add extra storage and a surface for working and eating.

Why not add a new top to a freestanding piece of furniture and extend the edge for an eating counter? The minimum overhang would be 25-30cm, but there are a few considerations to note when extending the top. Take care not to shift the balance of weight so much that the piece is unstable (people love to rest their elbows, adding weight to the surface). Also you may need to add brackets to support the overhang.
 
SV Design
11. Add a Showstopper

A simple kitchen with simple cabinetry is downplayed by a showpiece range hood. Playing up one feature is a great way to detract from less interesting elements.
 
source: houzz.com
Read

A Classic Never Goes Out of Style: Designing with Black

Perhaps it had to happen. Coming full circle, could it be that black is finally the New Black? It's always been a critical design element, one that evokes drama and depth, adding contrast and transition. Black can delineate and define the lightest of colour schemes and, on its own, has always made a strong statement. 

Dark bedroom with black bedsheet

Perhaps it's this outspoken nature that keeps some people from flirting with this design Prince of Darkness. Too much black can feel heavy and overbearing, just as an abundance of white has weaknesses of its own, creating a washed-out effect.

Black wall in kitchen

Incorporating black into your design scheme, though, is often essential with the need for judicious subtlety. Let's learn more about this powerful style element and how best to apply it practically to home design. 

The “feel” of black

Bedroom with mix of back and yellow design elements

Look no further than the iconic Little Black Dress to summon the sophistication and elegance of the colour. Black is serious; a black-tie affair has gravitas. A key element of chiaroscuro, black is by definition the absence of light. It can feel grounding, a basis upon which to be built. 

There are negative associations too. It's the colour of mourning, death and sinister darkness. Too much black is formidable, unapproachable and sad. Just as the black of night is cheered by the sparkle of stars and glow of the moon, so too must we recognize the need for contrasting elements. On its own, black is daunting. 

Black as a design component

Because of its drama, contrast and weight, black slips easily into many classic design styles. Modern styles that work well with minimalist approaches often suit monochromatic colour schemes, of which black-and-white is the most elemental. 

Black and white bathroom tile

Despite its suitability in that context, there's nothing exclusively minimalist about black. Black and white tile floors, from grand Victorian foyers to Art Deco bathrooms, find a place in plenty of design schemes. ContemporaryStreamline Moderne, and Mid-Century Modern could all scoop these ideas up. 

Black mirror in front entrance

Very few design styles don't benefit from the contrast that black adds, even if it's merely a black frame on a mirror or piece of art. The idea of layering perhaps evokes overhanging drapery panels for many, but you don't need to go full-on Bohemian to add layers to your home. In a room full of bright colours and natural light, adding subtle touches of black adds a chromatic layer, against which the light elements shine even stronger. 

Black couch surrounded by people

When a bolder statement is needed, forget subtlety and add a black leather sofa or overstuffed armchair. In an industrial loft space, painting exposed ductwork or mechanicals flat black is a common way to de-emphasize the often busy appearance of these elements.

Black exterior walls of a home

Don't forget your home's exterior either. Choosing a light colour for the bulk of the house is often well-accented when the trim contrasts, and black is an excellent choice. Windows, door frames, eaves and downspouts can sharply define the shape of your home while bringing the other influences that black offers.

The power and versatility of black is going to creep into your home anyway, perhaps around the edges of your flat screen or as part of an upholstery pattern. Make yourself aware of its powerful effect and you'll find ways to add richness and depth to your interior spaces.  

Do:

  • alternate your black and light elements;
  • use black as an accent;
  • use metal accents and finishes to contrast black focal points;
  • contrast white walls with a black ceiling, trim, door or floor;
  • accent white paint with black frames and fixtures.

Don't:

  • use more than one shade of black;
  • over-repeat or stack black elements (avoid black on black);
  • combine black with other dark shades, like navy blue or indigo;
  • combine black walls with black ceilings or floors.

Whether you're using black furniture or accessories to accentuate white walls, or creating a deep layered effect with black walls punctuated by light picture frames, wall hangings and furniture, you're sure to enjoy injecting this sophisticated shade into your home décor.


source: realtor.ca

Read

10 Stylish Ways to Maximize Bathroom Storage
When you’re tackling a bathroom remodel, whether with the help of a bathroom designerarchitect or contractor, including ample, efficient storage is an important consideration. Read on for 10 inspiring examples of compact, hallway and kids’ bathrooms that get storage right and see if one (or more) of these ideas might work in your space.
Manello Construction, LLC
1. Wall-to-Wall Vanity

Off-the-shelf vanities often leave a bit of dead space on either side, which is less than ideal, especially when you’re working with a smaller space. If you have the option, it can be worth it to have a custom vanity made to reach from wall to wall, as seen in this bathroom from Manello Construction. This setup maximizes storage space and looks sleeker to boot.
 
 
DTLA DESIGN
If your bathroom layout prevents a wall-to-wall vanity, opt for a design that fills the maximum amount of wall space. In this bathroom from DTLA Design, the substantial vanity features ample drawer space, a deep apron-front sink and plenty of counter space. To get an idea of what a dramatic difference this kind of change can make, check out the before photo.
 
Sanders Pace Architecture
2. Ceiling-Height Storage

If your bathroom has high ceilings, make the most of them by taking storage all the way to the top. Tall shelves flank the door in this bathroom by Sanders Pace Architecture, providing lots of space to stash towels and display items.

See more of this updated historic Tennessee home
 
BUILT Design Collective
In this space from Built Design Collective, a ceiling-height cabinet adds a significant amount of storage — and with open shelving up top and a closed cabinet below, it has the best of both worlds.
 
 
Katie Monkhouse Interior Design
3. Gap-Filling Shelving

Transform what would otherwise be an awkward, narrow gap at the foot of the bathtub into convenient, useful shelving, as seen in this space from Katie Monkhouse Interior Design. Open shelves can make a small space feel larger, but cluttered surfaces can negate the effect. Using identical baskets to corral belongings (as seen here) is a smart solution.
 
Cohesively Curated
The same shelving idea can be used no matter how your bathroom is configured. In this space from Cohesively Curated, open shelves fill a gap right by the entrance.

Find a bathroom designer on Houzz
 
Nathalie Priem Photography
4. Sleek Storage Wall

Instead of trying to fit all your bathroom storage in the vanity, consider dedicating an entire wall to it. With sleek flat-panel doors and a single open shelf in the center, a storage wall like this can hide everything from spare towels to toiletries.

Find a cabinet professional on Houzz
 
schemes & spaces
5. Hidden Drawers

Make use of an awkward space (such as the nook beneath a staircase) to add recessed drawers or cabinetry. In this bathroom from Schemes & Spaces, flat-front drawers are nearly invisible, tucked into an unused corner — but they provide essential storage for toiletries.

6 Plumbing Hacks for Pocket-Size Properties
 
Juxtaposed Interiors
6. Hooks and Ladders

Sometimes the simplest solution is the best. Case in point: This kids’ bathroom by Juxtaposed Interiors keeps towels organized with a combination of wall hooks and a rustic leaning ladder.

See more of this children’s bathroom makeover
 
Regan Baker Design Inc.
7. Recessed Shelves

Need just a smidgen of extra storage? Fit sleek recessed shelves into the wall adjacent to the vanity, as in this bathroom from Regan Baker Design. To keep things looking neat, store messier items (like toothpaste) behind closed doors and set your prettiest toiletries on the open shelves.
 
E2 Homes Ltd
8. Storage Bench

This bathroom from E2 Homes does double duty as a pool changing area with wall hooks for towels and a sleek storage bench for tucking away gear. Built-in benches like this can also be a good choice for kids’ bathrooms, providing little ones and parents a spot to sit at bath time and storage for tub toys below.
 
post Architecture
9. Laundry

Incorporating a compact laundry area into your bathroom design can be a smart use of space however you accomplish it. In this innovative design from Post Architecture, a laundry zone in the middle of the bathroom hides a washer, dryer and storage behind sleek doors that fold in half and then back to take up the least amount of space.

See more of this clever laundry room-bath combo
 
Alfio Garozzo Fotografo
10. Hotel Helper

Not just for travelers, a wall-mounted clothing rack can prove quite useful for hanging delicate items to dry or planning outfits for the week ahead. Fill the floor space below with a freestanding storage piece, or opt for a folding clothing rack if space is extra tight.
 
Source: houzz.com
Read

Examining Fireplaces: Function, Feature and Performance

It's hard to dispute how relaxing it is to curl up under a cozy blanket while cradling a hot beverage in front of a crackling fire on a cold evening. Fireplaces in Canadian lifestyle have undergone a shift in purpose over the years from staple heat source to optional design feature. If you're thinking of installing one or updating or converting an older fireplace, there's a lot to consider. Let's explore the different types of fireplaces and the features, benefits and risks involved.


Built-in fire place in cozy living room

Wood-burning fireplaces

There's nothing like the snap and crackle of a real wood fire—its welcoming rustic scent wafting through your home. While a traditional wood-burning fireplace has numerous parts, there are essentially three main components: fire box, flue and chimney. The firebox is where you place the firewood, the flue is what controls air flow and the chimney is how the smoke exits the home.

Pros:

  • Visually appealing.
  • Can be used to cook in emergencies.
  • Requires no utility hook-ups.
  • Uses a renewable resource.
  • Fuel is often easy to find and can be reasonably-priced.

Cons:

  • Expensive to install.
  • Most heat escapes up the chimney.
  • Backdrafts can cause smoke incursion in the home.
  • Chimney must be cleaned and inspected by a professional annually.
  • Ash and wood can cause messy debris.
  • Extra insurance is required.
  • Often require additional protective doors or screens to help contain embers.

Performance: Most wood-burning fireplaces are intended for aesthetic appeal and supplementary heat rather than being a whole-home solution. Be mindful that using a fireplace in the same room as your thermostat may prevent your furnace from running, causing other rooms in the home to cool down. You may need to adjust the thermostat up a few degrees when you have a fire or use a thermostat with multiple sensors in your home to offset this.


Wood stove in a rustic log cabin

Wood and pellet stoves

Wood and pellet stoves are a great way to help keep your home warm during the winter, while also acting as a focal point for the room. Although wood stoves are also wood-burning, they should be considered separately from fireplaces because their function is more utilitarian. Pellet stoves burn small, compressed wood pellets via a hopper. The pellets typically burn hotter and cleaner than wood and some stoves include heat distribution kits which have the potential for whole-home coverage. Keep in mind, pellet stoves require electricity so, if the power goes out, they can't be used as a source of heat like a wood stove can.


Installation for both options can carry a heavy price tag, but one can't argue against their obvious appeal, especially when living in colder climes. 


Pros:

  • Powerful heat source through conductive and radiant heat.
  • Can help reduce utility costs during winter.
  • Once lit, less air is needed to maintain combustion.
  • Provides a heat source for warmth and cooking in the event of a power outage.

Cons:

  • Temperature regulation is difficult.
  • High surface temperatures can pose a burn risk, especially with children.
  • The chimney must be cleaned and inspected by a professional annually.
  • They eat up space because they must be a safe distance from adjacent walls and furniture.
  • Extra home insurance is required.
  • Expensive to purchase and install.

Performance: Because you can control the airflow to slow the burn, they can produce heat for five to six hours before they need to be stoked. Be careful not to add too much wood because it is easy to overheat your space with a wood stove.


Close-up of a gas fireplace flame

Gas fireplaces

With the widespread use of natural gas for water and home heating, gas fireplaces have become common fixtures in many homes. There are many great-looking options that mimic the realistic look of a wood-burning fireplace. What they lack in realism, they make up for in convenience and they can be less costly to install and maintain than wood-burning alternatives.

Pros:

  • Easy to operate.
  • Adjustable flame feature.
  • Cleaner-burning.
  • Low-cost operation.
  • A chimney isn't needed (although proper venting is).
  • Electronic ignition makes them easy to light.
  • Can be inserted into an existing fireplace.

Cons:

  • Does not look fully realistic.
  • Most require both gas and electrical connections.
  • Produces carbon monoxide (always have a working CO detector in the same room).
  • Requires annual maintenance and inspection.

Performance: Much like the wood-burning fireplace, the gas fireplace is perfectly suitable for heating a single room and, in fact, can be more efficient at doing so than its woody counterpart. This is because many gas fireplaces have fans which push heated air into the room, which is regulated with a built-in thermostat. 


Fireplace built into wall with paintings and candles on the mantle.

Electric fireplaces

Electric fireplaces have taken a long-time fixture and turned it into an appliance. Electric fireplaces can be placed in just about any room of your home, especially if it is a standalone unit, which doesn't require installation. What they lack in uniqueness, they make up for in function. They still give that impression of a real fire, while some also perform double duty as a heater with built-in elements and fans.

Pros:

  • Easy to operate.
  • Most affordable.
  • Can be installed and used in any room.
  • Requires little maintenance.
  • Cleanest and safest to operate.
  • Can be used even during the summer because heat is optional.

Cons:

  • If used frequently for heat, they could increase hydro bills substantially.
  • Flames are not real and does not look like a real fireplace.
  • Shorter lifespan—need to be replaced more frequently.

Performance: Their performance is similar to that of gas fireplaces because they are only suitable to heat one room. Portable units are more convenient than wood-burning or gas fireplaces because they can be moved to and used in any room in your home.


Man's feet being warmed by a fireplace


Whether you prefer the realistic quality of a wood-burning fireplace, the heating benefits offered by a wood stove or the convenience of gas or electric fireplaces—there is something for every taste. Wood-burning fireplaces and stoves will certainly appeal for those seeking a more rustic look, while the modern feel of gas and electric is perfect for the contemporary-minded. Or, if you would just like to create that cozy ambiance without a fireplace at all, installing a mantel and hearth with a few well-placed candles is a fantastic low-cost solution. Whatever you decide for your home, it's always recommended to consult a professional to make sure you decide on the right solution for your needs and space.  


Source: realtor.ca

Read
The trademarks REALTOR®, REALTORS®, and the REALTOR® logo are controlled by The Canadian Real Estate Association (CREA) and identify real estate professionals who are member’s of CREA. The trademarks MLS®, Multiple Listing Service® and the associated logos are owned by CREA and identify the quality of services provided by real estate professionals who are members of CREA. Used under license.